Preparation
Starting with a new micrograph, the following steps are required for preparation:
- Read in the micrograph image using the "File/Open" menu item, or read a STAR parameter file using the "Micrograph/Read parameters" menu item.
- Make sure the pixel size (middle right side) is set correctly.
- Save the parameter file using the "Micrograph/Write parameters" menu item. This ensures that the micrograph image file name is written into the parameter file.
- Calculate the power spectrum using the "Image/Power spectrum" menu item. If a micrograph is open choose the "Average multiple power spectra" and "Tiles" options, and set the tile size to the desired size. If a stack of particle images is open, only choose the "Average multiple power spectra" option.
- Save the powerspectrum using the "File/Save..." menu item. (I typically save it using the micrograph file name with the extension "_ps.mrc".)
- Select the "Micrograph/Fit CTF" menu item - this will open a new window used for CTF fitting.
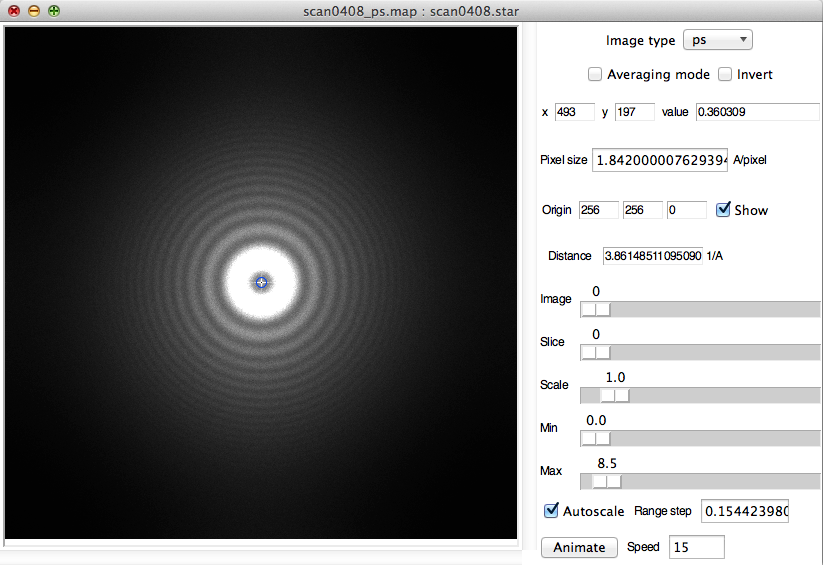
Power spectrum average from tiles extracted from a micrograph
Layout of the CTF fitting window
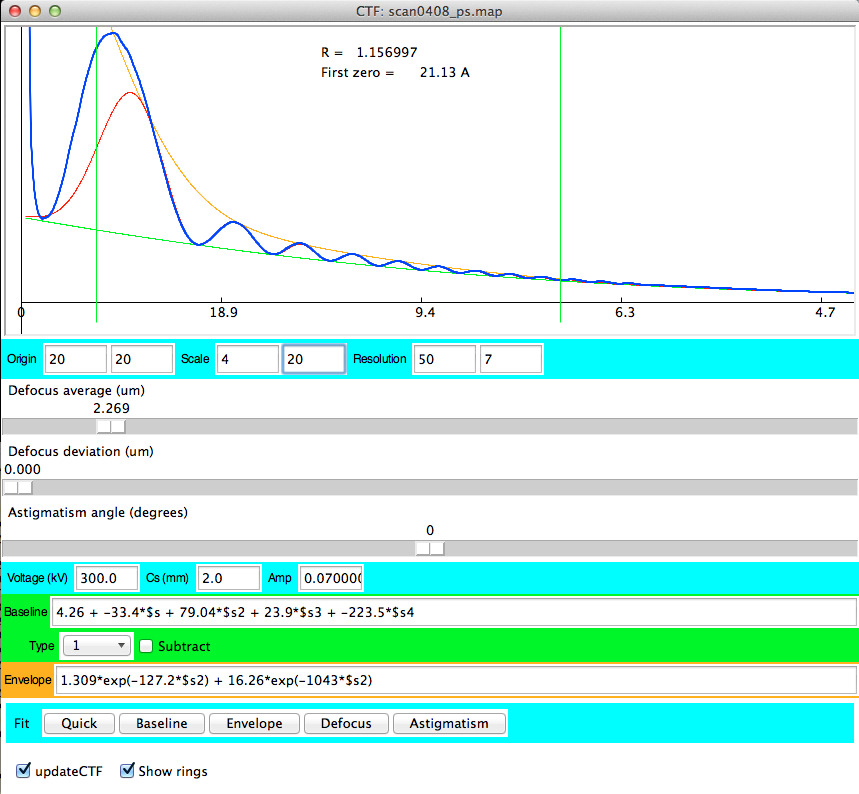
Initial fit using the "Quick" button
Curves:
- green: baseline
- orange: envelope
- red: model curve (including CTF) that should fit the radial power spectrum
- blue: radial power spectrum (RPS) calculated with consideration of astigmatism
Plot controls
- Origin: The origin of the plot can be set in screen pixel units relative to the lower-left corner
- Scale: The scale can be set to expand the plot horizontally and vertically
- Resolution: The resolution limits (vertical green lines in the plot) can be set and are used to calculate measures of fit.
Fitting the CTF
All of the curves except the radial power spectrum (blue) are updated continuously as the scale bars are changed. The radial power spectrum is updated on clicking the "updateCTF" button in the bottom left corner. In some entry boxes, pressing the return key will also change the radial power spectrum.The defocus deviation is not allowed to be larger than 90% of the defocus average.
The baseline and envelope equations can be changed to any form. The
independent variable is the reciprocal space distance, s, which must be
written as "$s" or its square as "$s2".
Valid equations are for
example:
0.2*exp(-5000*$s2) + 0.14*exp(-300*$s2)
0.2*exp(-1000*$s2)
The fitting typically proceeds with the "Fit" buttons from the left to the right. The "Quick" button does a quick fit without astigmatism and should always be done first. The "Baseline", "Envelope" and "Defocus" buttons refine the fit for each curve separately and can be used multiple times in any order. The "Astigmatism" button starts an attempt to refine the defocus deviation and astigmatism angle.
Please note, the automatic fitting is not always accurate and the result should not be blindly accepted! It is important to finally refine the fit by hand and make sure the parameters are reasonable.
The R value should not be taken as a definitive measure of fit. A better measure of fit is to find those CTF parameters that best fit the minima or zeroes of the CTF curve.
Reading and saving CTF parameters
The "Micrograph/Read parameters" and "Micrograph/Write parameters" menu items are used to read and write parameter files with all the current CTF fitting parameters (usually in STAR or XML formats).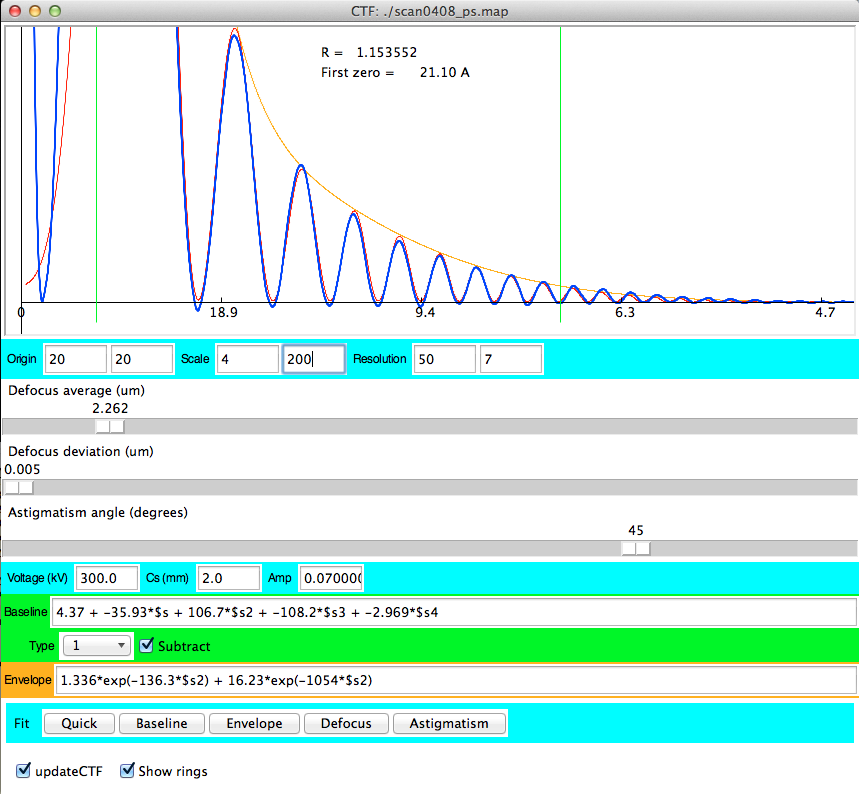
Final fit including astigmatism